Author Archives: theezitguy

SharePoint – Customize Wiki Headings with CSS

Hello everyone. Today I want to show you how you can customize the Wiki Headings of a SharePoint 2010 Wiki via CSS to make them look better.

Here you can see all Headings and Colored Headings in their default style. (Not really pretty in my opinion)

sharepoint_wiki_headings_before

To change this we will do the following:

First you need to enable the SharePoint Site Collection and SharePoint Site Feature called “SharePoint Server Publishing Infrastructure”.

Next we create our custom CSS File. I called mine “Wiki.css”. Here is the code:


.s4-recentchanges
{
display:none;
}

.ms-rteElement-H1
{
font-size:xx-large !important;
font-weight:normal;
font-style:normal;
}

.ms-rteElement-H2
{
font-size:x-large !important;
font-weight:normal;
font-style:normal;
}

.ms-rteElement-H3
{
font-size:large !important;
font-weight:normal;
font-style:normal;
}

.ms-rteElement-H4
{
font-size:medium !important;
font-weight:normal;
font-style:normal;
}

.ms-rteElement-H1B
{
color:#ff8c00;
font-size:xx-large !important;
font-weight:normal;
}

.ms-rteElement-H2B
{
color:#ff8c00;
font-size:x-large !important;
font-weight:normal;
}

.ms-rteElement-H3B
{
color:#ff8c00;
font-size:large !important;
font-weight:normal;
}

.ms-rteElement-H4B
{
color:#ff8c00;
font-size:medium !important;
font-weight:normal;
font-style:normal;
}

After you have finished creating your CSS file upload it somewhere to your SharePoint Site Collection.

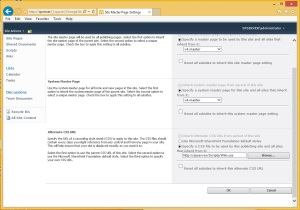
Next go to Site Actions > Site Settings >  Look and Feel > Master page and select the CSS File “Wiki.css” we created and uploaded to SharePoint and click on OK.

sharepoint_css_navigation_setting

After you have finished the above steps your Wiki Headings will look like this:

sharepoint_wiki_headings_after

Much better than the default Headings right? Well that´s it. Now you know how to customize your Wiki Headings to create better Wiki pages. I hope you liked my post and I hope to see you again 🙂

Sources:

http://junestime.wordpress.com/2012/05/22/change-the-default-markup-style-3/

http://www.ironspider.ca/adv/cssproperties/fontstyles.htm

http://www.w3schools.com/cssref/pr_font_font-size.asp

Tagged ,

SharePoint – Toplink Fly Out Menus

Hello everyone,

today I want to show you something I found out about SharePoint when I played around with some features. I want to show you how you can enable Fly Out menus in your Toplink Bar without using SharePoint Designer.

Important: You need SharePoint Server. As far as I know this solution does not work on SharePoint Foundation.

The first thing you need to do is to go to your SharePoint Site and enable the Site Collection Feature and Site FeatureSharePoint Server Publishing Infrastructure“.

sharepoint_toplink_features

Now click on the Navigation link.

sharepoint_toplink_site_settings

Now create a new Heading under Global Navigation and add some links:

sharepoint_toplink_navigation

Now go back to your Site and have a look at the Toplink Bar. It should look like this:

sharepoint_toplink_links

That´s it. Pretty simple right? I hope you liked my post and I hope to see you next time 🙂

Sources:

I tried this when I had some free time 🙂

Tagged

Raspberry Pi – VPN for all devices

Hello everyone. Today I want to show you how you can use your Raspberry Pi to tunnel all your traffic over a VPN connection. (I for example use this solution to watch my favorite TV shows on hulu. (I´m not an American and hulu is blocked outside the USA as you may know)). Ok let´s go.

The first thing you need to do is go to the VPNGate website and search for a VPN server. (one in the United States of America if you want to watch videos on hulu if you are located outside of the United States of America). If you found a VPN server download the ovpn file (OpenVPN) and store it on your Raspberry Pi.

Before we start you need to setup your Raspberry Pi as a Wireless Router like I explained in this post. After this is done we continue with the following:

To prevent issues update your Raspberry Pi first:

sudo apt-get update
sudo apt-get upgrade

Next install OpenVPN:

sudo apt-get install openvpn

Now move the ovpn file you downloaded by running the following command:

sudo mv <ovpn file> /etc/openvpn/openvpn.conf

Next we need to create a text file containing the user and password credentials:

sudo nano /etc/openvpn/user.txt

For a VPNGate VPN server enter vpn as username and vpn as password. Save the data in user.txt:

vpn
vpn

Next adjust the permissions of your user.txt file by running:

sudo chmod 755 /etc/openvpn/user.txt

Next we need to edit the openvpn.conf file (the ovpn file we downloaded earlier):

sudo nano /etc/openvpn/openvpn.conf

Now search for the following line:

#auth-user-pass

And replace it with this line to tell OpenVPN to use the user credentials provided in the user.txt file:

auth-user-pass user.txt

Now adjust the permissions of the openvpn.conf file by running:

sudo chmod 755 /etc/openvpn/openvpn.conf

Next reboot the Raspberry Pi. (It is faster than restarting the necessary services manually.)

sudo reboot

If you now have a look at your interfaces after your Raspberry Pi is has finished rebooting by running:

ifconfig

VPN_tunnel_interface

You will notice that you have a new interface called tun0. This is your new VPN tunnel interface.

If you followed my instructions from this post we need to do some clean up. Run the below command to clean up the iptables configuration:

sudo rm /etc/iptables.ipv4.nat

Next run the below commands to redirect all your traffic through the VPN tunnel interface:

sudo iptables -t nat -A POSTROUTING -o tun0 -j MASQUERADE
sudo iptables -A FORWARD -i tun0 -o wlan0 -m state --state RELATED,ESTABLISHED -j ACCEPT
sudo iptables -A FORWARD -i wlan0 -o tun0 -j ACCEPT

Save the iptables configuration by running:

sudo sh -c "iptables-save > /etc/iptables.ipv4.nat"

Now reboot your Raspberry Pi one last time:

sudo reboot

If you now connect to your Raspberry Pi´s wireless network all your traffic will be redirected through the VPN tunnel interface. (You can check if it works by using this website.)

Here is a picture from hulu without using this solution: (outside of the USA of course)

hulu_blocked

And here is a picture of hulu while using this solution:

hulu_unblocked

That´s it. It´s as simple as that. I hope you liked my post and I hope to see you again next time 🙂

And as always you can download all relevant files I used from here.

Update: Please keep in mind that the VPN relays on VPNGate are run by volunteers and that this means that your experience and the quality may vary. Please keep also in mind that hulu tries to blacklist all kinds of VPNs to make solutions like this useless so this solution might not work anymore in the future.

Sources:

http://www.vpngate.net/en/

http://alphaloop.blogspot.co.at/2014/01/raspberry-pi-as-vpn-wireless-access.html

http://serverfault.com/questions/544285/connection-reset-by-peer-when-im-trying-to-connect-to-server

https://awangga.wordpress.com/2014/03/12/setting-openvpn-client-using-vpngate-on-raspberry-pi/

Tagged

Raspberry Pi – Say Goodbye to Ads with Pi-hole

Hello everyone. Today I stumbled over a great way to get rid of nasty advertisements: The Pi-hole. I thought you might like this too so I wanted to share it. Here is how it works:

The Pi-hole uses a simple technique to get rid of advertisements: First you install a webserver on your Raspberry Pi which will serve an empty web page. Next you download the domain names of the advertisement servers you want to block and create DNS entries for them in the DNS server you install on your Raspberry Pi. And these DNS entries all point to your webserver which will serve you an empty page instead of advertisements. Pretty simple right? It´s practically DNS Spoofing to be specific. Now that we know how this works let´s get going.

Before you start with the steps below please have a look at this post (The IP addresses and configuration files I used in my current post are based on that post) and set up your Raspberry Pi as a wireless router. This way all your clients will be configured correctly by simply connecting to your Raspberry Pi´s wireless network.

The first step is to update your Raspberry Pi to avoid issues:

sudo apt-get update
sudo apt-get upgrade

Now install the webserver which will serve the empty html page for us. To do so run:

sudo apt-get install lighttpd

Now set the necessary permissions for the webserver.

sudo chown www-data:www-data /var/www
sudo chmod 755 /var/www

Next create a new directory called pihole and create and empty html page called index.html in it:

sudo mkdir -p /var/www/pihole
sudo touch /var/www/pihole/index.html

Next edit the lighttpd webservers configuration file.

sudo nano /etc/lighttpd/lighttpd.conf

Add the following line to the end of the file:

$HTTP["host"] =~ ".*" {
url.rewrite = (".*" => "pihole/index.html")
}

Next install the dnsutils and dnsmasq:

sudo apt-get install dnsutils dnsmasq

Stop the dnsmasq service till we finish our configuration.

sudo service dnsmasq stop

Next rename the dnsmasq.conf file (Do not delete it just to be safe):

sudo mv /etc/dnsmasq.conf /etc/dnsmasq.conf.bak

Now create a new dnsmasq.conf file:

sudo nano /etc/dnsmasq.conf

Add the following code to the file:

domain-needed
interface=wlan0
min-port=4096
cache-size=10000
log-queries
bogus-priv

We use the wlan0 interface since this is the interface where our clients will connect to.

Next you need to edit the resolv.conf file:

sudo nano /etc/resolv.conf

Replace all contents of the file with the following code: (Besides our own DNS server we add Googles DNS servers to resolve domain names)

nameserver 127.0.0.1
nameserver 8.8.8.8
nameserver 8.8.4.4

Next create the script which will get the DNS domain names from the ad servers we want to block:

sudo nano /usr/local/bin/gravity.sh

Here is the script:

#!/bin/bash
adListURL="http://pgl.yoyo.org/adservers/serverlist.php?hostformat=dnsmasq&showintro=0&mimetype=plaintext"
# Address to send ads to (your Raspberry Pi's IP)
piholeIP="192.168.0.1"
adFile="/etc/dnsmasq.d/adList.conf"
eventHorizion="/etc/dnsmasq.d/adList.conf.tmp"
curl $adListURL | sed "s/127\.0\.0\.1/$piholeIP/" > $eventHorizion
if [ -f "$eventHorizion" ];then
mv -f $eventHorizion $adFile
else
echo "Error building the ad list, please try again."
exit 1
fi
service dnsmasq restart

Set the necessary permissions for the script by running:

sudo chmod 755 /usr/local/bin/gravity.sh

Now run the script to get the DNS domain entries of the ad servers into your DNS server:

sudo /usr/local/bin/gravity.sh

Next set up a cronjob to update your DNS entries to keep your network ad-free. To do so run:

sudo crontab -e

Now add the following line to the file to run the update cronjob weekly:

@weekly /usr/local/bin/gravity.sh

Now we need to update the dhcp.conf file to redirect all clients DNS queries to our DNS server on our Raspberry Pi. Edit the file by running:

sudo nano /etc/dhcp/dhcp.conf

Now edit “option domain-name-servers” and make sure to replace the IP addresses with the IP address of your Raspberry Pi (mine is 192.168.0.1):

subnet 192.168.0.0 netmask 255.255.255.0 {
range 192.168.0.10 192.168.0.250;
option broadcast-address 192.168.0.255;
option routers 192.168.0.1;
default-lease-time 600;
max-lease-time 7200;
option domain-name "local-network";
option domain-name-servers 192.168.0.1;
}

That´s it. Now reboot your Raspberry Pi to apply the changes.

sudo reboot

Ok. Your Raspberry Pi Pi-hole is now ready to use.

Here is a picture of a website (http://winfuture.de/) with advertisements without the use of Pi-hole:

winfuture_not_ad_free

And here is a picture of the same website without advertisements by using Pi-hole:

winfuture_ad_free

And all that´s necessary is that you are connected to the wireless network of your Raspberry Pi to surf advertisement free. Pretty cool right?

I hope you liked my post and I hope to see you again next time 🙂

Sources:

http://jacobsalmela.com/raspberry-pi-block-ads-adtrap/

Tagged

Raspberry Pi – Use Proxy for “Caging” people

Hello everyone. Today I have something fun for you: You can use your Raspberry Pi Wireless Router (I showed you how to create one in my last post) to replace all pictures from the net with pictures of Nicolas Cage for people who are connected to your wireless network. (Believe me: “Caging” people is pretty funny. I used this prank on my brothers and it was hilarious 🙂 )

For this prank we will use a transparent proxy which replaces all pictures coming from the internet with a picture of Nicolas Cage using a perl script. Here are the steps to do this:

The first step is to update your Pi to avoid issues.

sudo apt-get update
sudo apt-get upgrade

Now install the Proxy software squid. It will help us to do the trick.

sudo apt-get install squid3

The next step is to edit the squid.conf file.

sudo nano /etc/squid3/squid.conf

Press Ctrl + W to search for “acl manager” and write the following line into the configuration file:

acl localnet src 192.168.0.0/24

The above line will define our wireless network (I called it “localnet”). Now search for “cachemgr” and add the following line to your configuration file:

http_access allow localnet

The above line will allow access to our proxy from our wireless network. Next search for “url_rewrite_program” and add the following line:

url_rewrite_program /var/www/scripts/images.pl

The above line will define the path to the script we will use to replace the pictures coming from the internet. (Don´t worry we will create the script soon.)

Next search for “http_port 3128” and add “transparent” to the line. This will turn our squid proxy into a transparent proxy (This way we will not need to configure proxy settings on the clients).

http_port 3128 transparent

Save the changes. And we are ready for the next step. (You can have a look at the full configuration file here.)

Next we need to install apache webserver to host our picture of Nicolas Cage.

sudo apt-get install apache2

Next create the following directories and place your picture into the content directory.

sudo mkdir /var/www/scripts
sudo mkdir /var/www/content

Now go to the scripts directory and create a perl script called images.pl.

cd /var/www/scripts
sudo nano images.pl

Have a look at the script below and modify it according to your environment if necessary: (I got the script from here)


#!/usr/bin/perl
########################################################################
# replaceImages.pl --- Squid Script (Replace every image) #
# g0tmi1k 2011-03-25 #
########################################################################
use IO::Handle;
use POSIX strftime;

$debug = 0; # Debug mode - create log file
$imageURL = "http://192.168.0.1/nicolas-cage.jpg";

$|=1;
$pid = $$;

if ($debug == 1) { open (DEBUG, '>>/tmp/replaceImages_debug.log'); }
autoflush DEBUG 1;

print DEBUG "########################################################################\n";
print DEBUG strftime ("%d%b%Y-%H:%M:%S\n",localtime(time()));
print DEBUG "########################################################################\n";
while (<>) {
chomp $_;
if ($debug == 1) { print DEBUG "Input: $_\n"; }
if ($_ =~ m/.*$imageURL/) {
print "$imageURL\n";
}
elsif ($_ =~ /(.*\.(gif|png|bmp|tiff|ico|jpg|jpeg|swf))/i) { # Image format(s)
print "$imageURL\n";
if ($debug == 1) { print DEBUG "Image Replaced: $_ \n"; }
}
else {
print "$_\n";
if ($debug == 1) { print DEBUG "Output: $_\n"; }
}
}

close (DEBUG);

After you saved the script you need to give it the execution right by running:

sudo chmod +x images.pl

Next you need to edit the default file of your apache webserver:

sudo nano /etc/apache2/sites-available/default

Have a look at the below script and modify the file according to your environment:


<VirtualHost *:80>
ServerAdmin webmaster@localhost
DirectoryIndex nicolas-cage.jpg

DocumentRoot /var/www/content
<Directory />
Options FollowSymLinks
AllowOverride None
</Directory>
<Directory /var/www/content>
Options Indexes FollowSymLinks MultiViews
AllowOverride None
Order allow,deny
allow from all
</Directory>

ScriptAlias /cgi-bin/ /usr/lib/cgi-bin/
<Directory "/usr/lib/cgi-bin">
AllowOverride None
Options +ExecCGI -MultiViews +SymLinksIfOwnerMatch
Order allow,deny
Allow from all
</Directory>

ErrorLog ${APACHE_LOG_DIR}/error.log

# Possible values include: debug, info, notice, warn, error, crit,
# alert, emerg.
LogLevel warn

CustomLog ${APACHE_LOG_DIR}/access.log combined
</VirtualHost>

To redirect all http traffic to our transparent squid proxy we need to setup a new iptables rule. Create the rule by running:

sudo iptables -t nat -A PREROUTING -i wlan0 -p tcp --dport 80 -j REDIRECT --to-ports 3128

To save the above rule permanently run:

sudo sh -c "iptables-save > /etc/iptables.ipv4.nat"

The last step is to run the below command to start our squid proxy at boot:

sudo update-rc.d squid3 enable

That´s it. Reboot your Pi and you are ready to go.

Now if someone connects to your network and opens a website in his/her browser the result will look like this:

raspberry_pi_caging

As you can see it works as expected 🙂

I hope you liked my today´s post and I hope to see you again.

As always you can download all scripts I used in my post from here.

Sources:

http://wiki.ubuntuusers.de/Squid

http://xmodulo.com/squid-transparent-web-proxy-centos-rhel.html

http://failverse.com/creating-the-kittynet/

Tagged

Raspberry Pi – Turn your Pi into a Wireless Router

Hello everyone. Today I want to show you how you can turn your Raspberry Pi into a Wireless Router. I know there are many posts of this kind out there in the net but I wanted to show you the easiest solution I found on the net so far since it can be quite troublesome to find a matching Wireless adapter and to set up hostapd.

What do you need?

  • A Raspberry Pi Model B (plus power adapter, SD card and a LAN cable. And I recommend to set up SSH)
  • A Wireless adapter. I used the EDIMAX EW-7811UN Wireless USB Adapter I bought from Amazon (Link here) since it is quite cheap and it worked for me pretty well.
  • Raspbian wheezy as Operating System. You can download it from here.
  • A (wireless) router to download the necessary software packages.

Hardware Setup

Install the Raspbian wheezy Operating System on your SD card and put it into your Raspberry Pi. Next plug your LAN cable into your Raspberry Pi and connect the other end to your (wireless) router you use to access the internet. As mentioned above I would recommend to enable SSH on your Raspberry Pi so you can configure it without having a monitor, keyboard, etc. ready.

Turn your Pi into a wireless router

Now to the most interesting steps.

The first thing you need to do is to update your Raspberry Pi by running the following commands: (It´s always a good idea to update first to prevent issues with outdated versions, etc.)

sudo apt-get update
sudo apt-get upgrade

Next install the software packages for the DHCP server. (Ignore error messages if you receive some. They are normal since you haven´t configured the DHCP server yet.)

sudo apt-get install isc-dhcp-server

The next step is to install hostapd. Since our wireless adapter (EDIMAX EW-7811UN Wireless USB Adapter) needs a driver not supported by hostapd we need to download a custom version of hostapd (Thanks to this guy (http://jenssegers.be/) we have this simple solution. Please give him some credit for his work.). Simply run the following commands to install this custom version:

wget https://github.com/jenssegers/RTL8188-hostapd/archive/v1.1.tar.gz
tar -zxvf v1.1.tar.gz
cd RTL8188-hostapd-1.1/hostapd
sudo make
sudo make install

The above commands will take some time so please be patient.

Next we need to configure our DHCP server.

sudo nano /etc/dhcp/dhcpd.conf

Find the following lines and place a hashtag (#) in front of them to remove them from the configuration file:

option domain-name "example.org";
option domain-name-servers ns1.example.org, ns2.example.org;

Now search for the following line and remove the hashtag in front of it:

#authoritative;

Now go to the end of the file and add the following configuration:

subnet 192.168.0.0 netmask 255.255.255.0 {
range 192.168.0.10 192.168.0.250;
option broadcast-address 192.168.0.255;
option routers 192.168.0.1;
default-lease-time 600;
max-lease-time 7200;
option domain-name "local-network";
option domain-name-servers 8.8.8.8, 8.8.4.4;
}

You can alter the above configuration to fit your needs. The above configuration will set up your DHCP server to hand out IP addresses from 192.168.0.10 to 192.168.0.250 and will set the DNS server to Googles DNS servers 8.8.8.8 and 8.8.4.4.

Don´t forget to save the changes.

Next we need to configure on which Interface our DHCP server will hand out IP addresses. To do so run this command:

sudo nano /etc/default/isc-dhcp-server

Now search for:

INTERFACES=""

And add the name of your WLAN Interface to it like this: (My WLAN Interface is called “wlan0”)

INTERFACES="wlan0"

Next we need to assign a static IP address to out WLAN Interface. To do so run the following command:

sudo nano /etc/network/interfaces

Now assign the IP address you chose as “option routers” in the dhcpd.conf file (in our example: 192.168.0.1) to your WLAN Interface. Your file should now look like this:


auto lo

iface lo inet loopback
iface eth0 inet dhcp

#allow-hotplug wlan0
#iface wlan0 inet manual
#wpa-roam /etc/wpa_supplicant/wpa_supplicant.conf
#iface default inet dhcp

allow-hotplug wlan0

iface wlan0 inet static
address 192.168.0.1
netmask 255.255.255.0

Ok. Now we have finished setting up our DHCP server.

For the next step we need to setup hostapd. To do so run the following command:

sudo nano /etc/hostapd/hostapd.conf

Now search for ssid and wpa_passphrase and enter an SSID Name (for example: MyPi) and Password (for example: Password1) for your future wireless network. That´s it. We finished configuring hostapd.

Next we need to enable NAT. First we need to make sure that our Raspberry Pi will forward packages. To do so we run:

sudo nano /etc/sysctl.conf

And search for:

#net.ipv4.ip_forward=1

Remove the hashtag in front of the line and save your changes.

Run the following command to enable the forwarding immediately:

sudo sh -c "echo 1 > /proc/sys/net/ipv4/ip_forward"

Next we need to configure rules to forward all traffic from our WLAN Interface (wlan0) to our cable bound network (eth0) to make sure that Clients connected to our WLAN network can access the internet. To do so run the following commands:

sudo iptables -t nat -A POSTROUTING -o eth0 -j MASQUERADE
sudo iptables -A FORWARD -i eth0 -o wlan0 -m state --state RELATED,ESTABLISHED -j ACCEPT
sudo iptables -A FORWARD -i wlan0 -o eth0 -j ACCEPT

Now run the following command to save the rules otherwise they will be lost when you turn off your Raspberry Pi:

sudo sh -c "iptables-save > /etc/iptables.ipv4.nat"

Ok. We finished configuring NAT. The last step is to make sure that all services and configurations we made above will be set up at start so that we do not need to run them every time we start our Raspberry Pi.

To automatically start our DHCP server at start run the following command:

sudo update-rc.d isc-dhcp-server enable

To automatically start hostapd at start run the following command:

sudo update-rc.d hostapd enable

Unfortunately I received the following error:

update-rc.d: using dependency based boot sequencing
update-rc.d: error: no runlevel symlinks to modify, aborting!

If you receive the same error run the following commands:

sudo ln -s /etc/init.d/hostapd /etc/rc2.d/S02hostapd
sudo update-rc.d hostapd enable

After I did that it worked for me. (Thanks to this thread I was able to solve this problem: http://www.raspberrypi.org/forums/viewtopic.php?f=63&t=37898)

Now we need to make sure that the traffic forwarding rules will also get loaded at start. To do so open the interfaces file by running:

sudo nano /etc/network/interfaces

Add the following line to the end of the file:

up iptables-restore < /etc/iptables.ipv4.nat

Ok. We are almost there. Now reboot your Raspberry Pi by running:

sudo reboot

Wait till your Raspberry Pi has rebooted. You should now find a new SSID with the name you chose (for example: MyPi). If everything worked you should be able to connect to it by entering your Password (for example: Password1) and you should be able to access the internet.

Well, that´s it. Your Raspberry Pi is now a wireless router. I hope you liked my post and I hope to see you again next time 🙂

By the way my configuration files are stored here if you want to have a look at them. And please have a look at the sources if you want to know more about this topic.

Sources:

http://raspberrypihq.com/how-to-turn-a-raspberry-pi-into-a-wifi-router/

http://www.raspberrypi.org/forums/viewtopic.php?f=63&t=37898

http://www.maketecheasier.com/set-up-raspberry-pi-as-wireless-access-point

http://www.daveconroy.com/turn-your-raspberry-pi-into-a-wifi-hotspot-with-edimax-nano-usb-ew-7811un-rtl8188cus-chipset/

http://elinux.org/RPI-Wireless-Hotspot

http://jacobsalmela.com/raspberry-pi-and-routing-turning-a-pi-into-a-router/

Tagged

SharePoint – How to use mathematical formulas on your pages

Hello everyone. Today one of my clients asked me if it is possible to add mathematical formulas to SharePoint pages. I found a solution here that gives you the possibility to generate gif images from Latex code. Please give the guys from codecogs some credit for their awesome solution and donate some money if you liked this solution.

Now lets get down to business 🙂

Here is the example code I used to add the Theorem of Pythagoras to my SharePoint page:

<html>
<head>
<script type="text/javascript" src="http://latex.codecogs.com/latexit.js"></script>
</head>
<body>
<h1>Theorem of Pythagoras</h1>
<div lang="latex">a^2 + b^2 = c^2</div>
</body>
</html>

Upload the above script to your SharePoint site and add a Content Editor Web Part to the page. Add the link to your script to the Content Editor Web Part.

sharepoint_math_formula_editor

The result will look like this:

sharepoint_math_formula_finished

Pretty simple right? This way you can add all kinds of mathematical formulas to your SharePoint pages.

I hope you liked my post and I hope to see you again next time 🙂

Sources:

http://www.codecogs.com/latex/integration/htmlequations.php

http://stackoverflow.com/questions/11824093/how-to-integrate-a-shortcode-feature-in-sharepoint-wikis

Tagged ,

Raspberry Pi – Automatic Number/License Plate Recognition (ANPR/ALPR)

Hello everyone. Today I want to show you how you can use your Raspberry Pi and Javaanpr to automatically extract a license plate number from a picture. You can use this technology to open your garage door for example.

To make this work run the following commands to update your Raspberry Pi and to install Java on it: (Oracle Java 7 JDK did the best job in my tests)

sudo apt-get update
sudo apt-get install oracle-java7-jdk

After the update and installation have finished you need to download Javaanpr.

Now use a test picture of a license plate and run the following command:

time java -jar javaanpr.jar -recognize -i test.jpg

Here is a screenshot of my test: (I used the Raspberry Pi B Model and I did not overclock it.)

raspberry_pi_javaanpr

It took about 10 seconds for Javaanpr to get the license plate number. Pretty fast in my opinion.

Well, that´s it. You can now use this knowledge for you projects. For example an automatic garage door opener. I hope you liked my post and I hope to see you next time 🙂

Update: I forgot to mention the following: To use Javaanpr all you need to do is to place the jar you downloaded from here into some directory on your Raspberry Pi and run the command

java -jar javaanpr.jar -recognize -i test.jpg

 to execute it. That´s all.

Sources:

http://object-network.blogspot.co.at/2014/02/seven-uses-of-raspberry-pi-camera.html

http://www.raspberrypi.org/forums/viewtopic.php?f=37&t=58257

http://javaanpr.sourceforge.net/

http://www.raspberrypi.org/forums/viewtopic.php?t=44080&p=374054

http://scruss.com/blog/2013/09/26/faster-java-on-raspberry-pi/

Tagged ,

SharePoint – Use JQuery to highlight rows

Hello everyone. Today I want to show you how you can use jQuery and SPServices to conditionally highlight rows of your SharePoint Web Parts.

Here is the script you need:

<script type="text/javascript" src="/sites/test2/Script/jquery.min.js"></script>
<script type="text/javascript" src="/sites/test2/Script/jquery.SPServices.min.js"></script>

<script language="javascript" type="text/javascript">

$(document).ready(function() {
$().SPServices({
operation: "GetListItems",
async: false,
listName: "Test",
CAMLQuery: "<Query><Where><Eq><FieldRef Name='YesNoField' /><Value Type='Integer'>1</Value></Eq></Where></Query>",
CAMLViewFields: "<ViewFields> <FieldRef Name='ID' /> </ViewFields>",
completefunc: function (xData, Status) {
$(xData.responseXML).SPFilterNode("z:row").each(function() {

$("tr[iid*='"+ $(this).attr("ows_ID").toString() + "']").css("background-color", "#A3F02E");

});
}
});
});

</script>

The above Script will check the value of the “YesNoField” column in your “Test” List and if the value is “Yes” (1) it will highlight the row. If the value is “No” (0) it will do nothing.

To use the script click on Edit Page on your website and add your List Web Part and a Content Editor Web Part and add a link to your script to the Content Editor Web Part. (You need to store the script somewhere on your website in a Library.)

sharepoint_setup_highlighted_row

If you set up everything correctly the result will look like this:

sharepoint_highlighted_row

That´s it. You can now use this method to highlight specific rows. I hope you liked my post. See you next time 🙂

And as always you can download my script from here.

Sources:

http://mekalikot.blogspot.co.at/2014/01/highlight-sharepoint-task-list-row.html

http://spservices.codeplex.com/wikipage?title=GetListItems

http://social.msdn.microsoft.com/Forums/sharepoint/en-US/1905cd40-c66b-4865-a036-299c88b8bc51/how-to-write-caml-query-for-yes-no-field

http://mekalikot.blogspot.co.at/2014/07/highlight-row-change-font-color-and.html

Tagged ,

SharePoint – Use JQuery to hide columns based on a Users Group Membership

Hello everyone. Today I want to show you how you can use jQuery and SPServices to hide SharePoint columns based on a users group membership.

In a previous post I explained how you can use jQuery and SPServices to Auto-Fill fields. Please follow the instructions in this post but use the script below instead in your NewForm.aspx and/or EditForm.aspx pages.


<script type="text/javascript" src="/sites/test/Script/jquery.min.js"></script>
<script type="text/javascript" src="/sites/test/Script/jquery.SPServices.min.js"></script>

<script language="javascript" type="text/javascript">
$(document).ready(function()
{
$().SPServices({
operation: "GetGroupCollectionFromUser",
userLoginName: $().SPServices.SPGetCurrentUser(),
async: false,
completefunc: function (xData, Status) {
var xml = xData.responseXML.xml;
if(xml.search('SharePoint Group') != -1)
{

$('nobr:contains("TestColumn")').closest('tr').hide();

}
}
});
});
</script>

Replace “TestColumn” with the Name of your column you want to hide. And replace “SharePoint Group” with the Name of your SharePoint Group. If you configured everything correctly your column will be hidden for members of the SharePoint Group you defined in the script. (To hide a column for everyone except a specific group replace

if(xml.search('SharePoint Group') != -1)

with

if(xml.search('SharePoint Group') == -1)

)

That´s it. Now you are able to hide columns from specific user groups. I hope you liked my post. See you next time 🙂

And as always you can download my script from here.

Sources:

http://www.sharepointnadeem.com/2011/09/hide-sharepoint-list-field-based-on.html

http://sharepointroot.com/2011/09/23/sharepoint-2010-how-to-hide-blog-fields-using-jquery/

https://theezitguy.wordpress.com/2014/05/26/sharepoint-auto-fill-fields-using-jquery-and-spservices/

Tagged ,